Stable Diffusion Installation and Usage Guide
※This explains how to install Stable Diffusion, but there may be challenging parts for those unfamiliar with IT.
If you have any questions, please feel free to ask on the forum below.
Table of Contents
Advantages and Disadvantages of Installing Stable Diffusion
As of 2024, unless you use Stable Diffusion, image generation will generally be done on external sites.
When using an external site, there are limits to the number of free uses and restrictions on the types of generated images.
However, by installing Stable Diffusion, you can freely generate as many images as you like for free. (Introducing a model allows you to generate various types of images.)
On the other hand, installing Stable Diffusion on your PC requires effort, so the difficulty level is higher than generating images on external sites.
Also, using Stable Diffusion to generate images using your PC's power may take time on low-spec PCs.
Prerequisites
The explanation assumes that the PC in use is running Windows OS.
※If there is demand, information for Mac will be added, so please let us know.
Overview of Installation
To run Stable Diffusion, Python and Git are required.
Python is a programming language, and Git is a program management tool.
You only need to install both, as you won't actually be programming.
Also, since Stable Diffusion itself has a considerable size, about 20GB of free space is required.
※Models also have a certain capacity, so adding more will increase the overall size.
Installation of Python
Download the installer from the official Python website below.
https://www.python.org/downloads/release/python-3106
※Installing an older version of Python may cause Stable Diffusion to malfunction.
Choose either "Windows installer (32-bit)" or "Windows installer (64-bit)".
※Which one to choose depends on whether your PC is 32-bit or 64-bit.
Refer to the following page to check the bit of your system.
Run the downloaded installer.
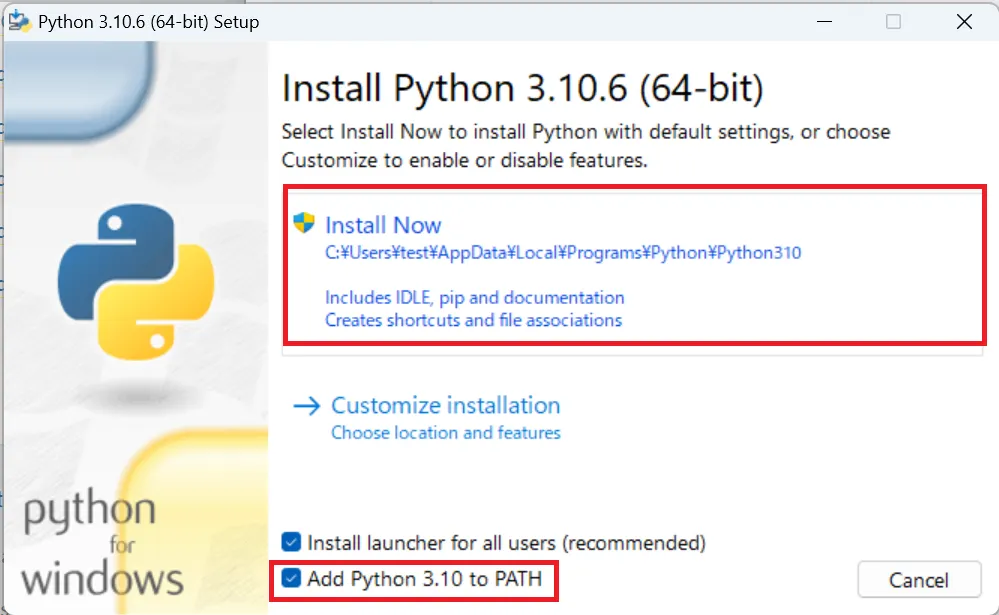
Make sure to check "Add Python to PATH".
Follow the on-screen instructions to complete the installation.
Installation of Git
Download the installer from the official Git website below.
https://git-scm.com/download/win
Choose either "32-bit Git for Windows Setup" or "64-bit Git for Windows Setup".
※Just like Python, the choice depends on the bit of your PC.
Run the downloaded installer.
Check "Additional Icons" during the installation.
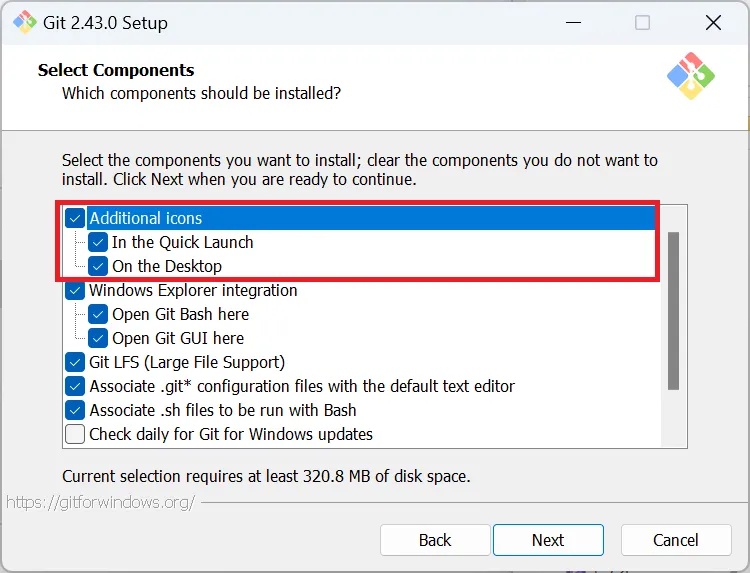
Proceed with the installation following the on-screen instructions.
Installation of Stable Diffusion
First, decide where to install the folder.
It's safer to choose a drive with sufficient space.
For simplicity, this time, we'll install it in "C:\sd".
※Please create an "sd" folder directly under the C drive. If you don't know how to create it, just continue reading. It will be explained later.
To install Stable Diffusion, you need to execute commands in the command prompt.
First, let's open the command prompt.
Press "Windows button" + "R" simultaneously.
A screen called "Run" will appear; there, type "cmd" and press OK.
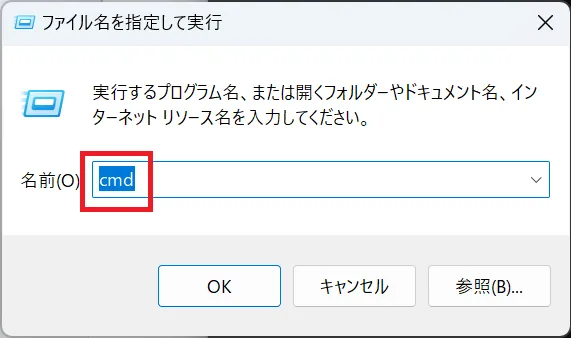
The command prompt will open.
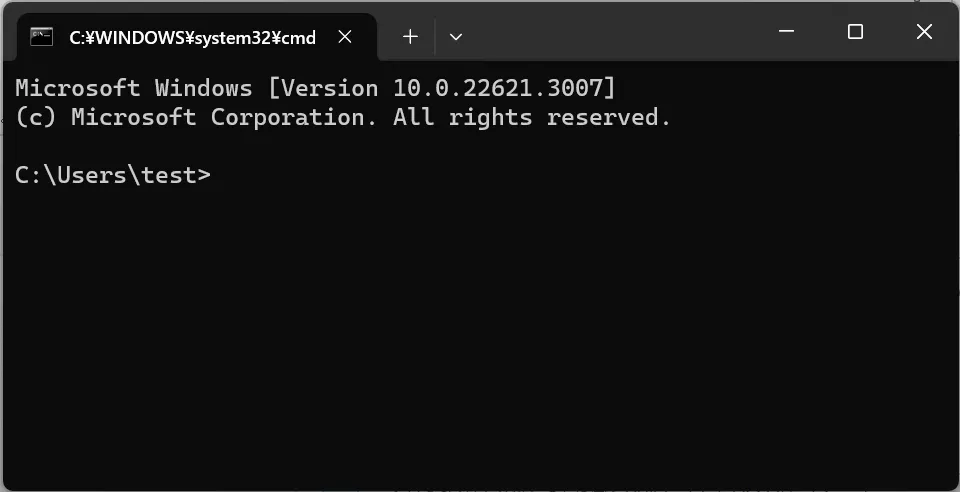
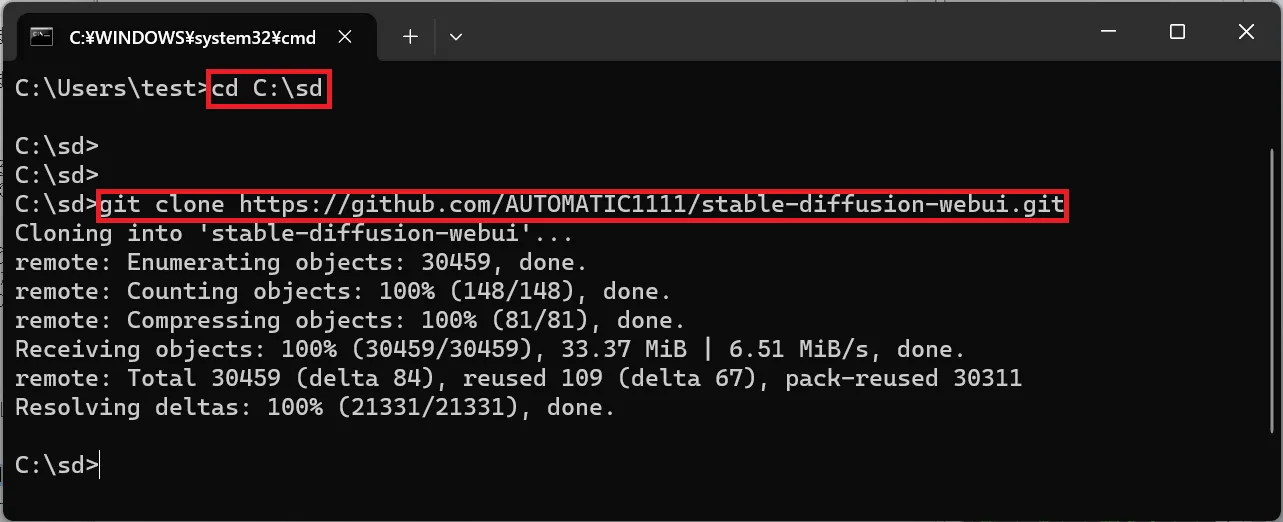
Execute the following command.
「cd C:\sd」
This command means moving to the "sd" folder created earlier.
※If you haven't created the "sd" folder, execute the command "mkdir C:\sd" to create the folder.
Execute the following command.
「git clone https://github.com/AUTOMATIC1111/stable-diffusion-webui.git」
By running this command, you can install the Stable Diffusion program.
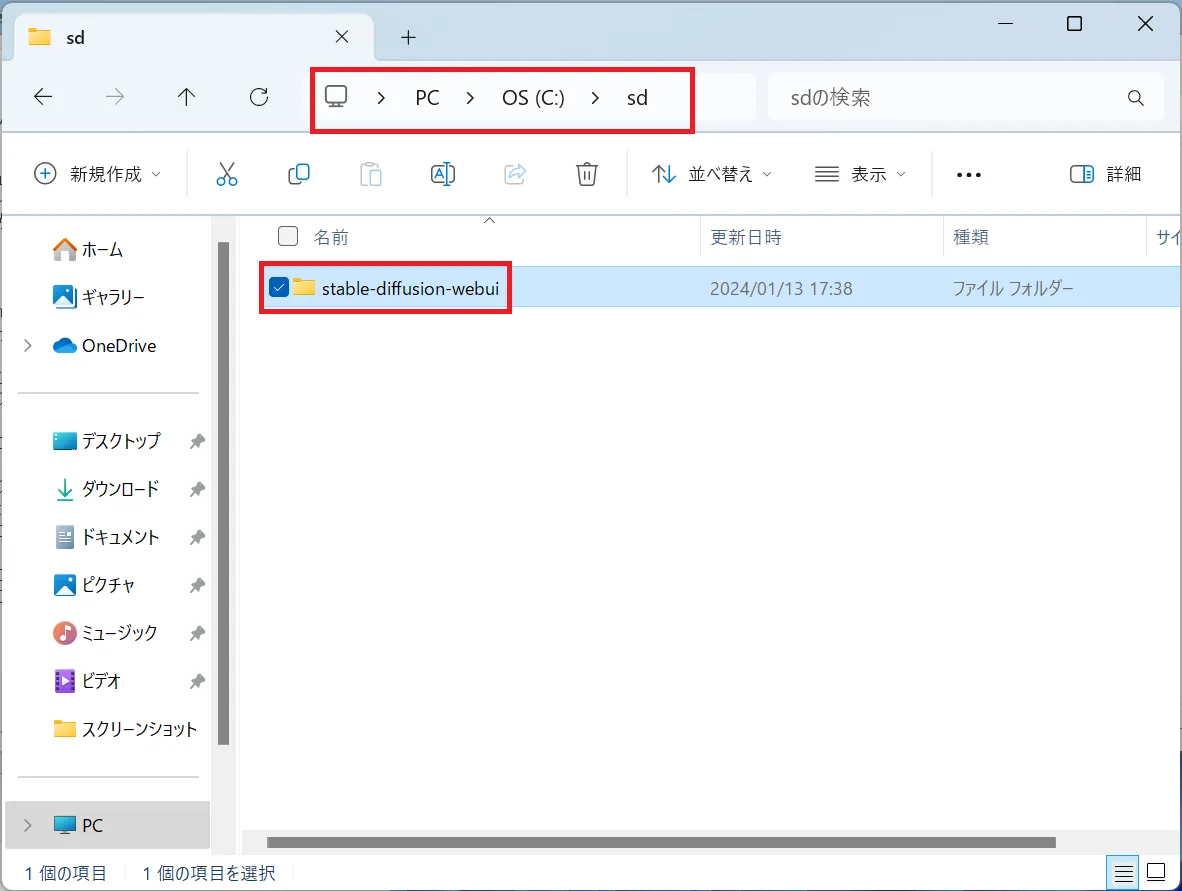
Now, let's navigate to the "sd" folder from File Explorer.
You can open File Explorer by pressing "Windows button" + "E".
You should see a folder named "stable-diffusion-webui" inside the "sd" folder.
If you have the model you want to use, place it in the following folder.
「C:\sd\stable-diffusion-webui\models\Stable-diffusion」
※I will skip detailed explanations about models. Even without preparing your own model, there is one from the beginning, so let's focus on running Stable Diffusion this time.
Execute the "webui-user.bat (Windows batch file)" in the "stable-diffusion-webui" folder to start Stable Diffusion.
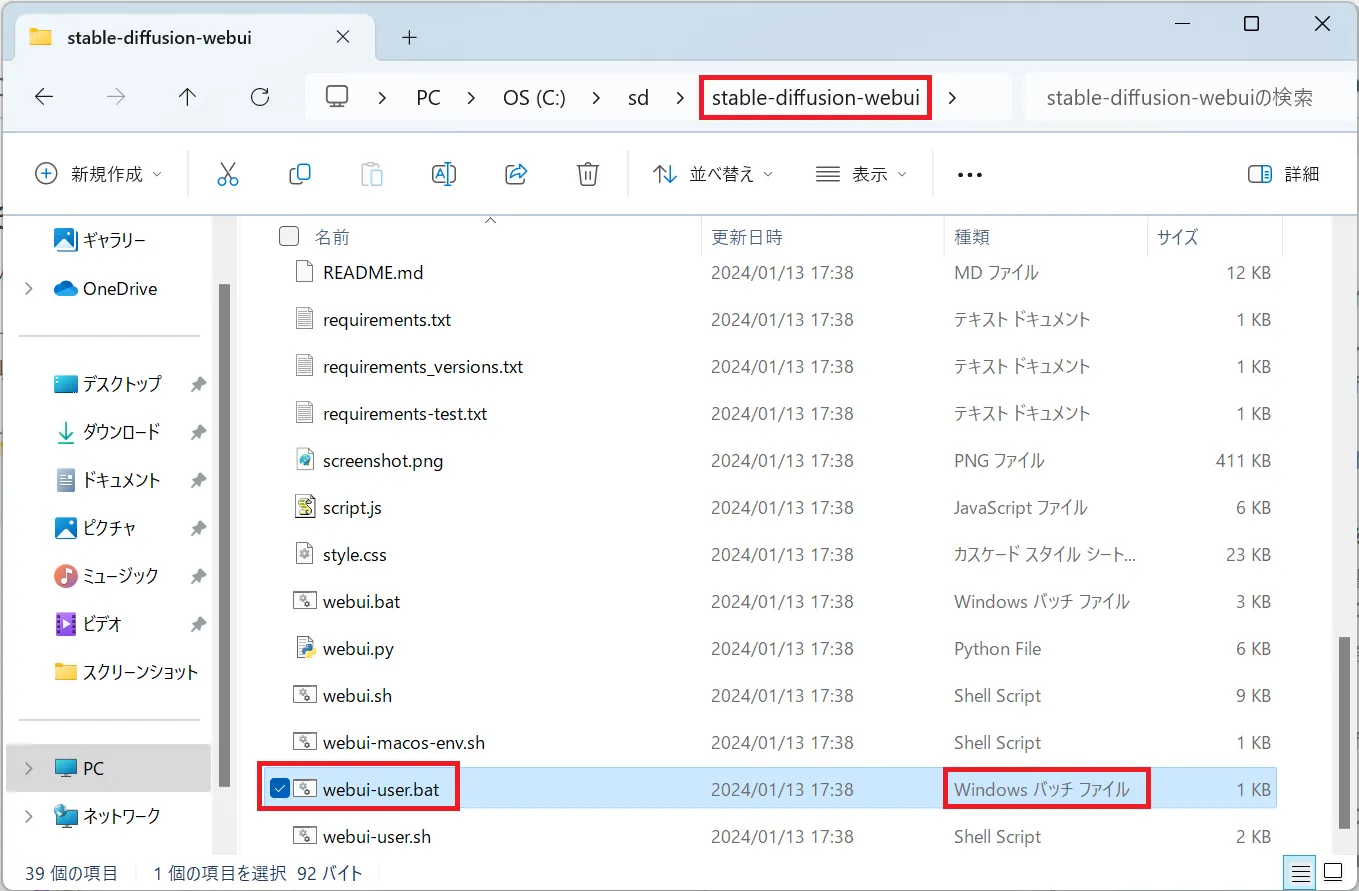
※The ".bat" part may be hidden. In that case, run the one labeled "Windows batch file."
The first startup takes quite a long time.
You may encounter the following error at startup.
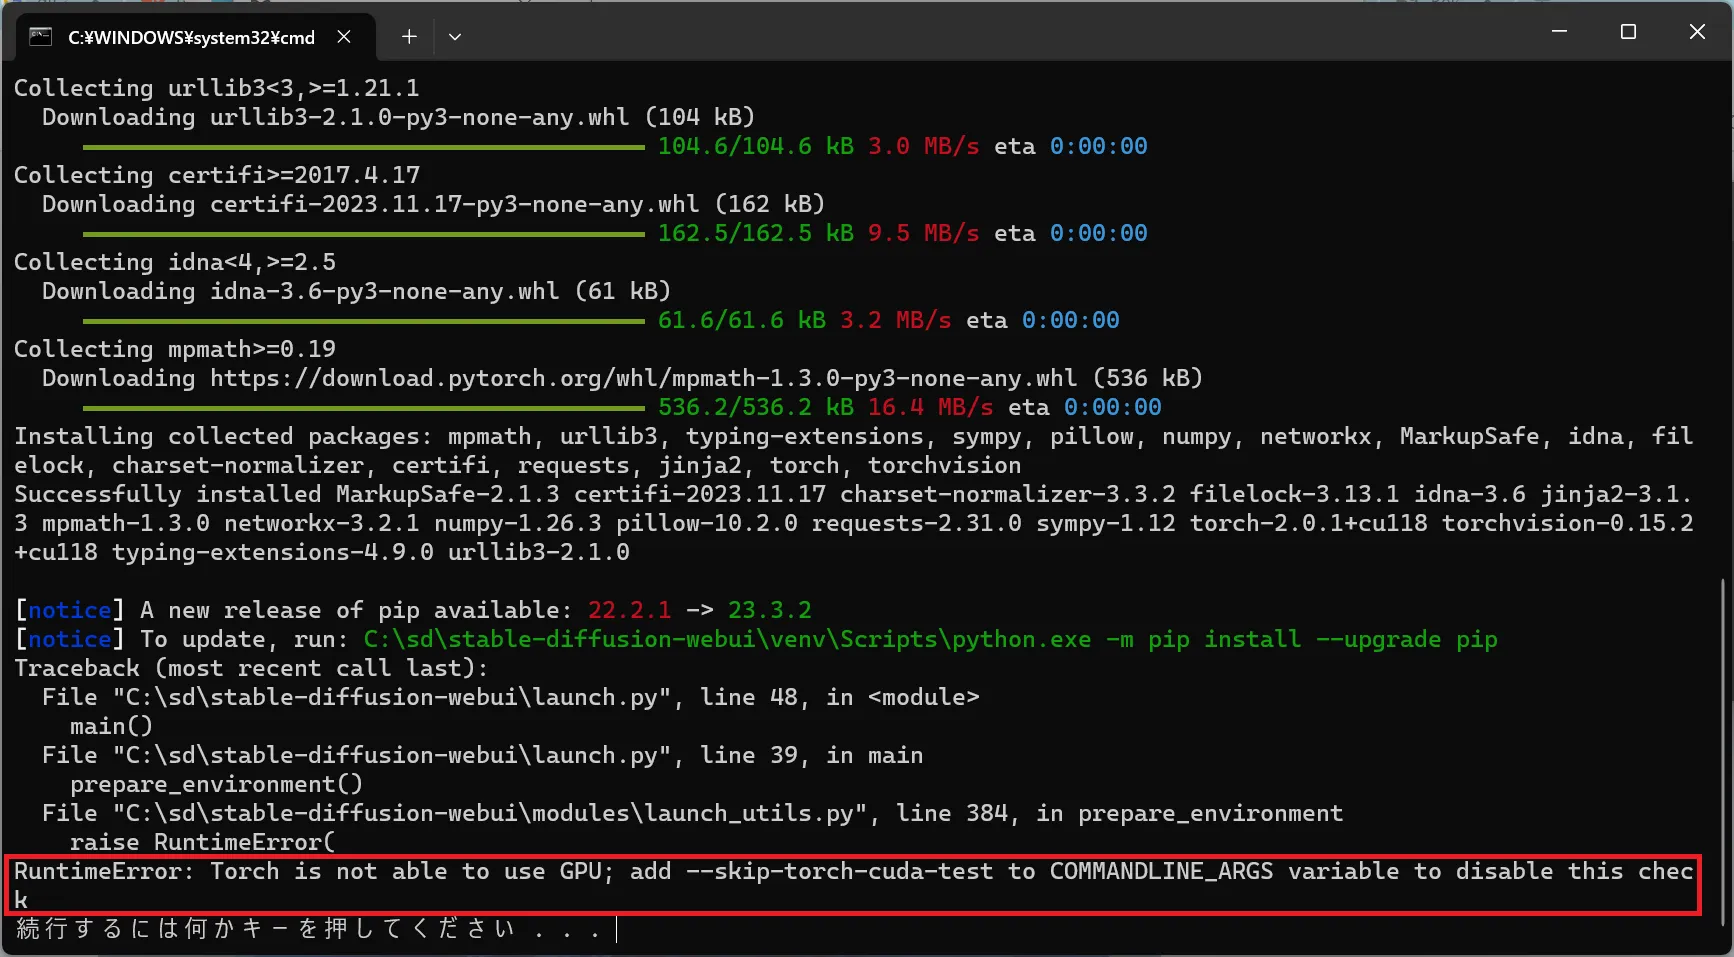
「RuntimeError: Torch is not able to use GPU; add --skip-torch-cuda-test to COMMANDLINE_ARGS variable to disable this check」
In that case, right-click on the "webui-user.bat" you ran earlier and edit it with Notepad.
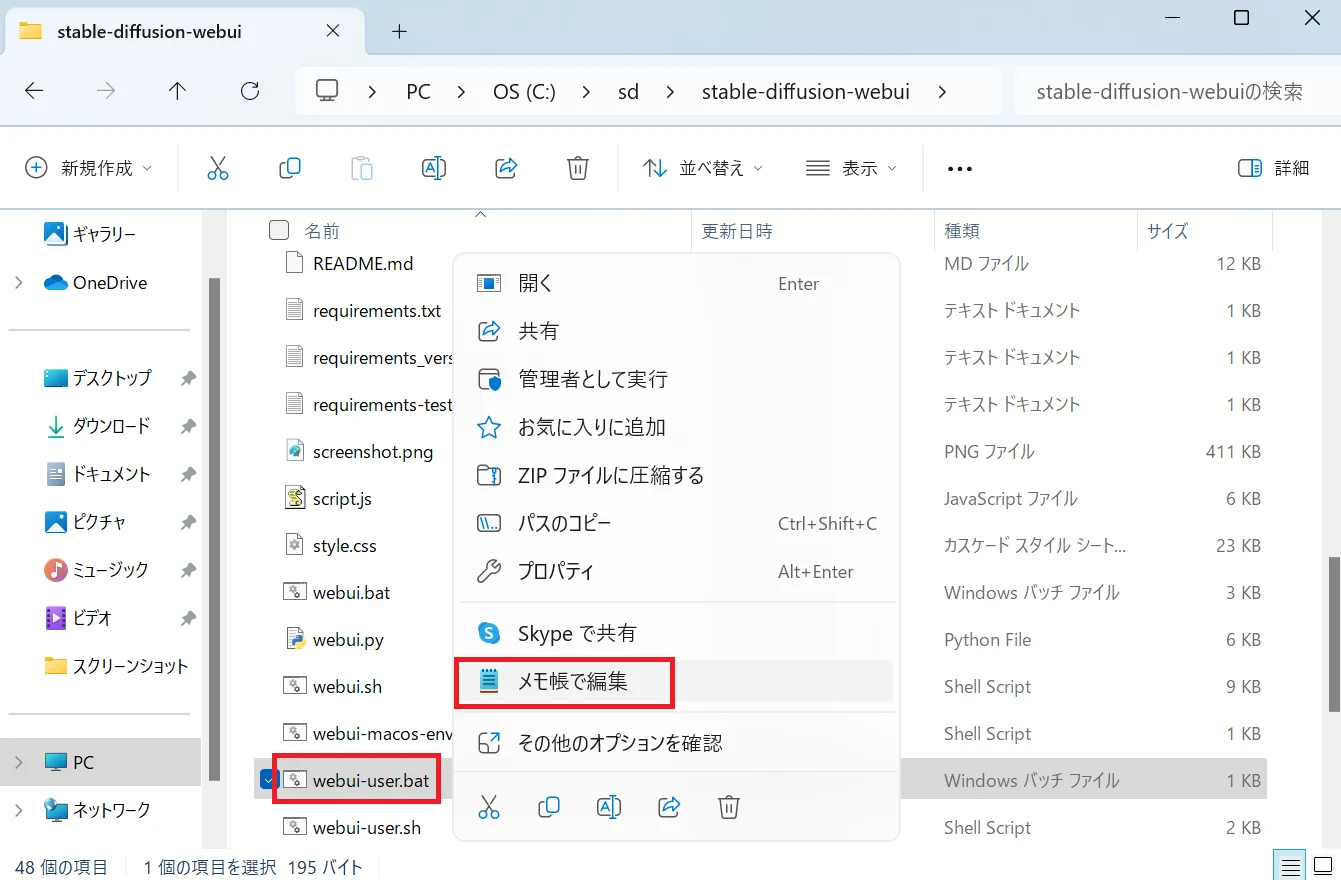
Add "--skip-torch-cuda-test --upcast-sampling --no-half-vae --use-cpu interrogate --precision full --no-half" to the "COMMANDLINE_ARGS" section.

After that, run "webui-user.bat" again.
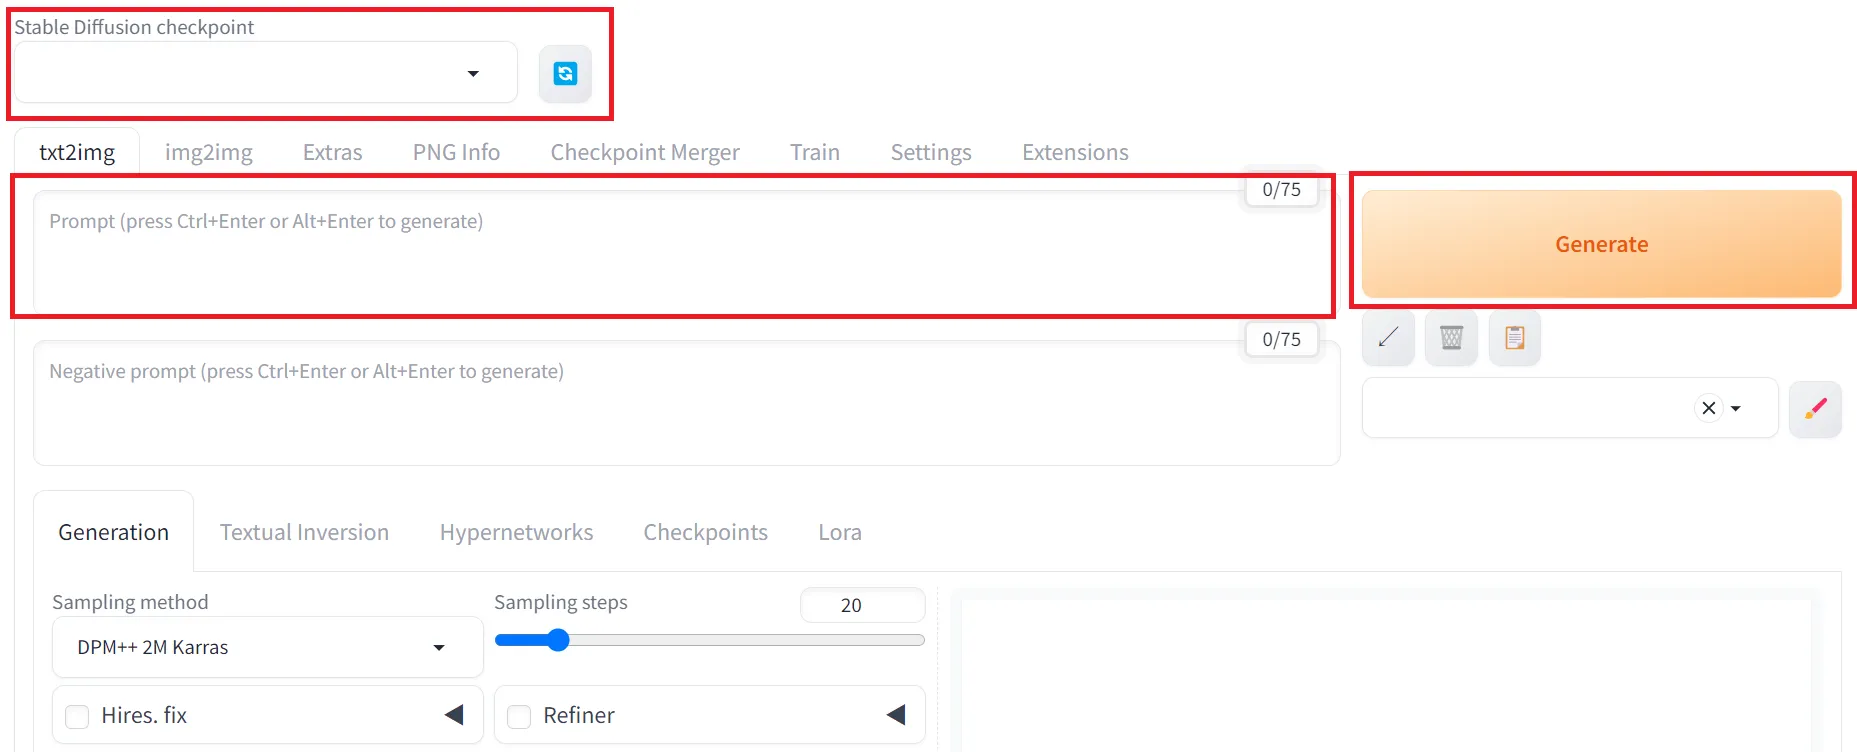
If the startup is successful, the Stable Diffusion screen will appear automatically.
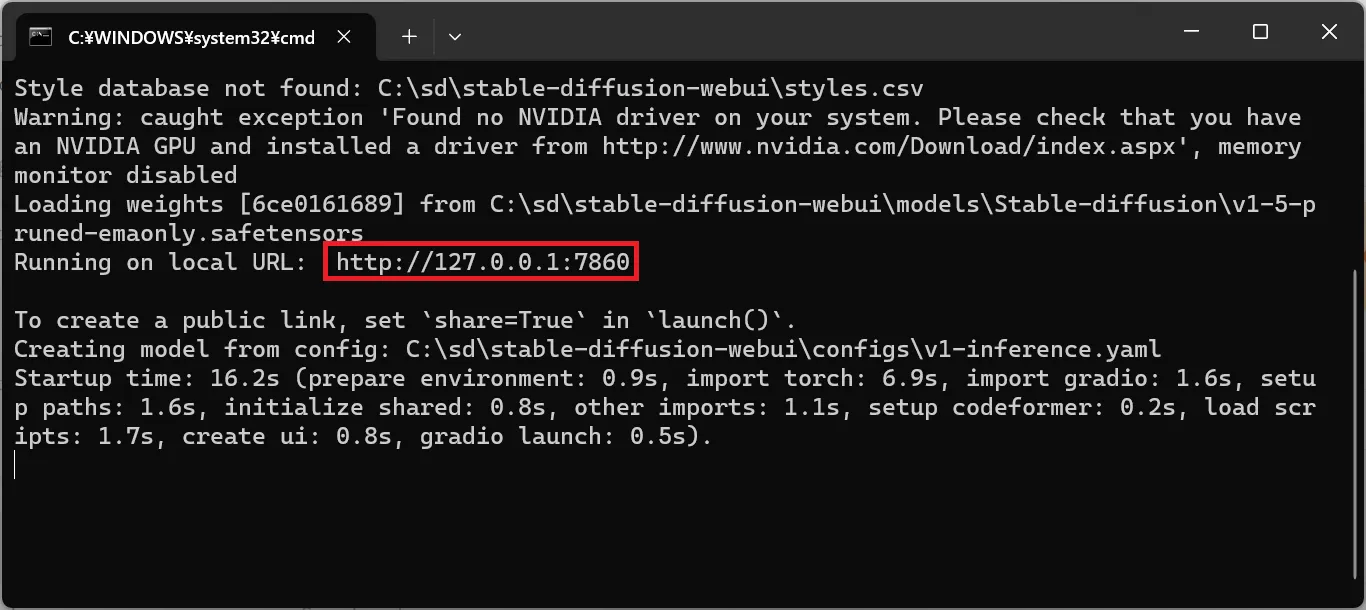
If the screen does not appear, enter the URL displayed in the command prompt into your browser.
For this demonstration, specify a random "Checkpoint (Model)" and enter "boy" in the prompt, then click the "Generate" button.
You will see the generated image in the bottom right corner of the screen.
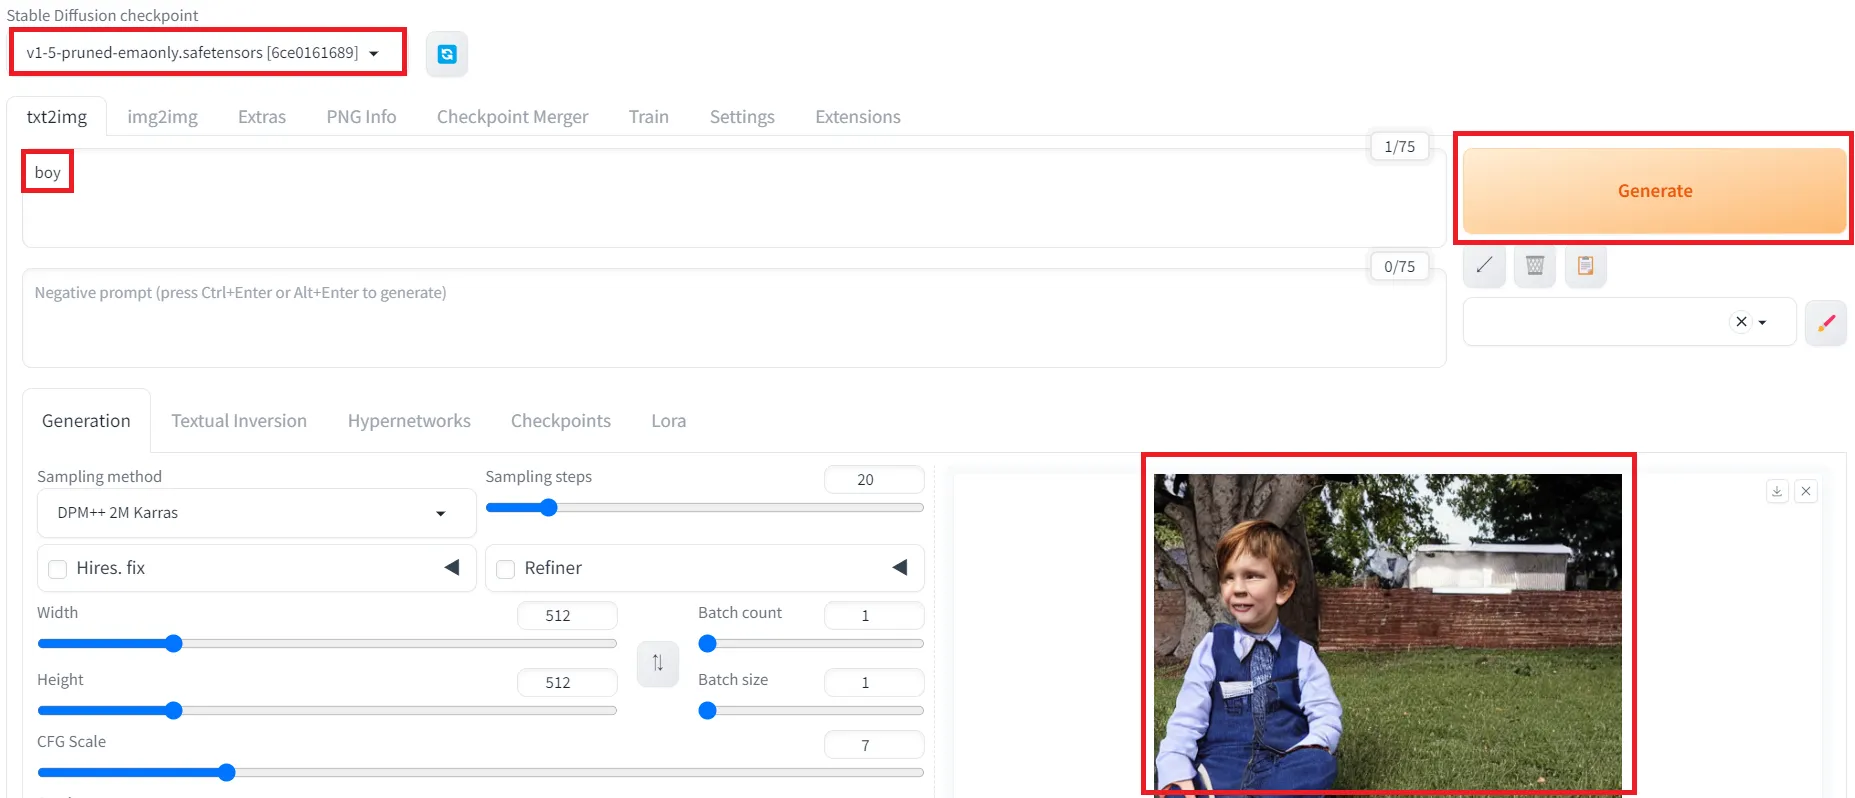
This concludes the explanation for starting Stable Diffusion.